Blog
Tips & Tricks
- Glazing in Oils
- Finding Your Subject
- Travelling With Oil Colours
- How To Use A Rigger Brush
- Painting Skin Tones
- Oils, Mediums, Solvents and Varnishes
Glazing in Oils, by Marcel Desbiens
People often ask me what’s the difference between a photograph (or printed image) and a painting. Beside the fact that the latter is made by someone, so has an expressive aspect, there are also many visual qualities added to the optical illusion that can be produced by oil colours.The advantage is the luminosity created by layering the paint gradually from thick and opaque to a thin sheer veil giving life to your colour. Light travels through the glaze and is reflected back off the opaque layer bellow. This of course will show best in a multi layering application of the paint like a painting from Vermeer. With the Alla Prima technique it is also possible to use a tinted background showing through the more or less opaque layer.
If you want to learn and practice with me, we run regular workshops, so put yourself on the waitlist at Glazing in Oils
If you want to read more about the way to use glazing in your painting, see the below article from Arts and Illustrators
What is a glaze?
Over the centuries, artists have used glazing as a means of creating colours that are richer than would be possible by simply mixing paint on the palette. A glaze is a thinly applied, transparent layer of colour contained within oil or acrylic glaze medium. Before application, a glaze mix will look a bit like coloured varnish. It is applied thinly with a fairly soft brush – my own preference is a long, flat, hog’s hair brush. Glazing can be applied in many separate layers, each one adding to the total cumulative effect.
A painting made with glazes is unique in the fact that each layer applied is distinctly separate from the paint below and above it. Glazing is always done on top of dry paint and, because of this, the colours of each layer do not physically mix with each other. Each layer remains pure, resulting in an interaction of bright, clear colours that can be fascinating to the eye, in which each layer contributes to the total visible effect.
The transparency in a glaze layer allows light to pass through it, reflect from the underlying paint and back out again so that when we look at a painting which has been glazed we are actually seeing an ‘optical mix’ comprised of each glaze layer, plus the painting that lies below. In addition, applying a glaze can assist in ‘bringing out’ the underlying colours within a painting, a bit like oiling wood to show the grain. By their nature, glazed colours will appear deeper and more saturated.
Top Tips
Always work wet on dry. Each glazed layer must be allowed to dry before you apply the next, so drying times are important. In oil painting, a fast drying, Alkyd-based medium like Winsor & Newton’s Liquin mixed with turpentine is helpful. Always try to work ‘fat over lean’ too – in other words, start painting with very little oil or medium in the mix and gradually increase the proportion of oil to turpentine as you progress throughout the painting. A ‘lean’ layer over a ‘fat’ one may not adhere properly, looks dull and might eventually crack.
Use glazes sparingly. A glaze can be graduated from dark to light, like a watercolour wash, by increasing or decreasing the ratio of paint to medium as you work, or by brushing more thinly. The whole painting does not have to be glazed either – you are in control of which areas receive it.
Work the layers before they dry. A glaze can be shaped to work in a specific area and once applied it can be manipulated in several ways before it dries. A brush carrying a small amount of glaze medium or turps can be used to remove part of the layer you’ve just painted to create highlights that can be ‘drawn’ in as required.
Subtract, don’t just add. A combination of brush and kitchen roll can remove even more. Simply dab with kitchen roll after diluting the glaze with the brush, as before. If you don’t like what you’ve done, gently work in some turps with a brush, dab off with kitchen roll and the glaze layer will be completely removed.
Try a light backdrop. Glazing works best over lighter underlying colours. It can look stunning over white or off-white highlights, giving an intensity of colour that cannot be achieved in traditional mixes. Experiment at first with a trace of a single colour mixed into your medium, paint thinly and progress from there.
Finding Your Subject, by Marcel Desbiens
I was recently looking for a subject to paint with my students for my next ‘water texture’ workshop and I was thinking about the process I go through to find the perfect image. I generally have three steps that I think are of use:First
Follow your feelings when thinking about a subject to paint. Go for what you love to look at, to be with, to be surrounded by – a subject that makes you feel good inside and one that you are being naturally drawn to.
For example, I have always been attracted to water. I like to be in or on it and feel good just thinking about being near a lake, the ocean waves, a waterfall, to hear the sounds of it, watch the flickering light or a colourful sunset on its surface.
Second
Look at the difficulties in painting the subject. Have a strategy in advance before making up your mind on the subject itself. Make a decision about the appropriate technique to use. You might find there is a lot you don’t know about the techniques needed to paint this particular subject or cannot find an easy strategy to do so. Some subjects are more difficult to paint than others!
You could reduce the level of difficulty by only painting a detail of that subject, or in some cases it would be better to view the subject from a distance.
For example, when painting water, I like to do it in stages – two or three layers to recreate the visual effects of transparency with multi-layers being seen through and then adding the fine details at the end.
For this I have to use a fairly quick-drying medium, spread thinly to ensure ease in applying multiple layers of paint wet-on-wet as well as to help the layers dry faster between coats. In my water texture workshops, I allow 3 one-day sessions, once per week and the timing works perfectly for this style.
Third
Find the subject in photos or real life. Taking your own photos is best or go online and purchase the copyright to paint from someone else’s photo. You might find it difficult to put together enough visual information for your own project otherwise.
Make sure you can see some fine details (with close-up cropped sections) if you are not used to improvising. Thus, a well-planned composition will enhance your artistic flair and give you a sound footing for your next subect.
Travelling With Oil Colours, by Robyn Collier
I have travelled overseas and interstate many times with my oil colours and I have found reasonably effective ways of moving around and flying with them. If you love using oils as I do – don’t be daunted by the thought of travelling with wet paintings, hazardous mediums and dirty brushes. Here are just a few of my favourite tips for traveling with oilsFirst
Don’t declare you oils as paints. I never declare my oils when traveling. In fact, nowhere on the tube does it say they are paint. They are Artists Oil Colours and as such are safe for flying – pigments usually bound with natural oils. I had quite a few students who had their oils confiscated on one of my painting holidays simply because they stated they were paint – a totally different thing.
Second
Carry a Material Safety Data Sheet (MSDS) with you just in case you are questioned. If you go to the website for your brand of oil colour and search MSDS or Safety Data – you should be able to print it off.
Third
Non-stick baking paper and fold back clips are good to cover a wet painting as long as your paint is not too thick and you don’t move the paper once it is in place. A small amount of paint may come off but it is usually very easy to touch up later.
Fourth
When flying I use a small, lightweight metal easel that fits comfortably into my suitcase.
Fifth
I always carry old plastic bags. They are handy for rubbish but also for weighing down your easel with a rock or two if you are painting out on a windy day. They weigh nothing in your baggage when empty.
How To Use A Rigger Brush, by Marcel Desbiens
A rigger brush is made of long soft bristles from natural or synthetic sources. They are very similar to the sign writer’s brushes and come in different lengths from 2cm to 5cm.The name comes from the way artists used the brush for painting marine subjects – the fine details and lines for the rigging and multiple masts. Landscape artists have also used them for fine details in tree trunks, branches, ripples on water, etc.
The best way to use a rigger is to load the brush with well-diluted paint and then drag it while keeping some pressure and moving in the direction of the handle.
Pushing harder results in hairs being flattened down to produce a larger line while pushing lightly results in a very fine line.
A straight and steady pull to drag the paint is better if made quickly, because going slowly can increase the risk of hand-shake.
It is important to hold the brush in a rigid manner, so your fingers are not bending and the whole movement is coming from the elbow pulling out with a light flexibility in the wrist.
You have to be aware of the pendular movement of your arm with the shoulder, as the pulling should come in a straight line without hesitation. It is also important to set enough space for your arm to move smoothly.
In any case, avoid holding this brush like a pen and bending your fingers like you are writing as this motion requires much shorter bristles to be precise.
When a curved line is needed, roll the handle slightly towards the right or the left to pull the tip of the brush in the direction you want to go without interrupting your dragging movement.
If you can practice these techniques you will become an expert at using the Rigger!
Painting Skin Tones, by Marcel Desbiens
When painting a portrait, a nude or in fact any skin tone, we need to think of a simple way to reproduce the volume and avoid trying to achieve the final result in one go.3D rendering of the human figure can be achieved with a monochrome undercoat. Breaking down the multiple challenges is the first step in painting as it can be very confusing to try to deal with so many elements at once; shape, tone, colour and merging the shape’s softness together.
The first thing to do is to start with an accurate drawing without the details. Charcoal is best to start with as it can be shifted and removed easily if needed. Smudging the edges and merging the grey tonal work is made easy with charcoal simply by using our fingers.
The process is very intuitive and progressive.
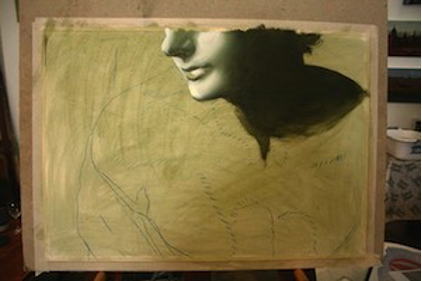
When the drawing is established, it is important to secure it permanently with a thin line of acrylic paint (any colour). This will avoid the problem of losing your drawing when applying the paint over it.

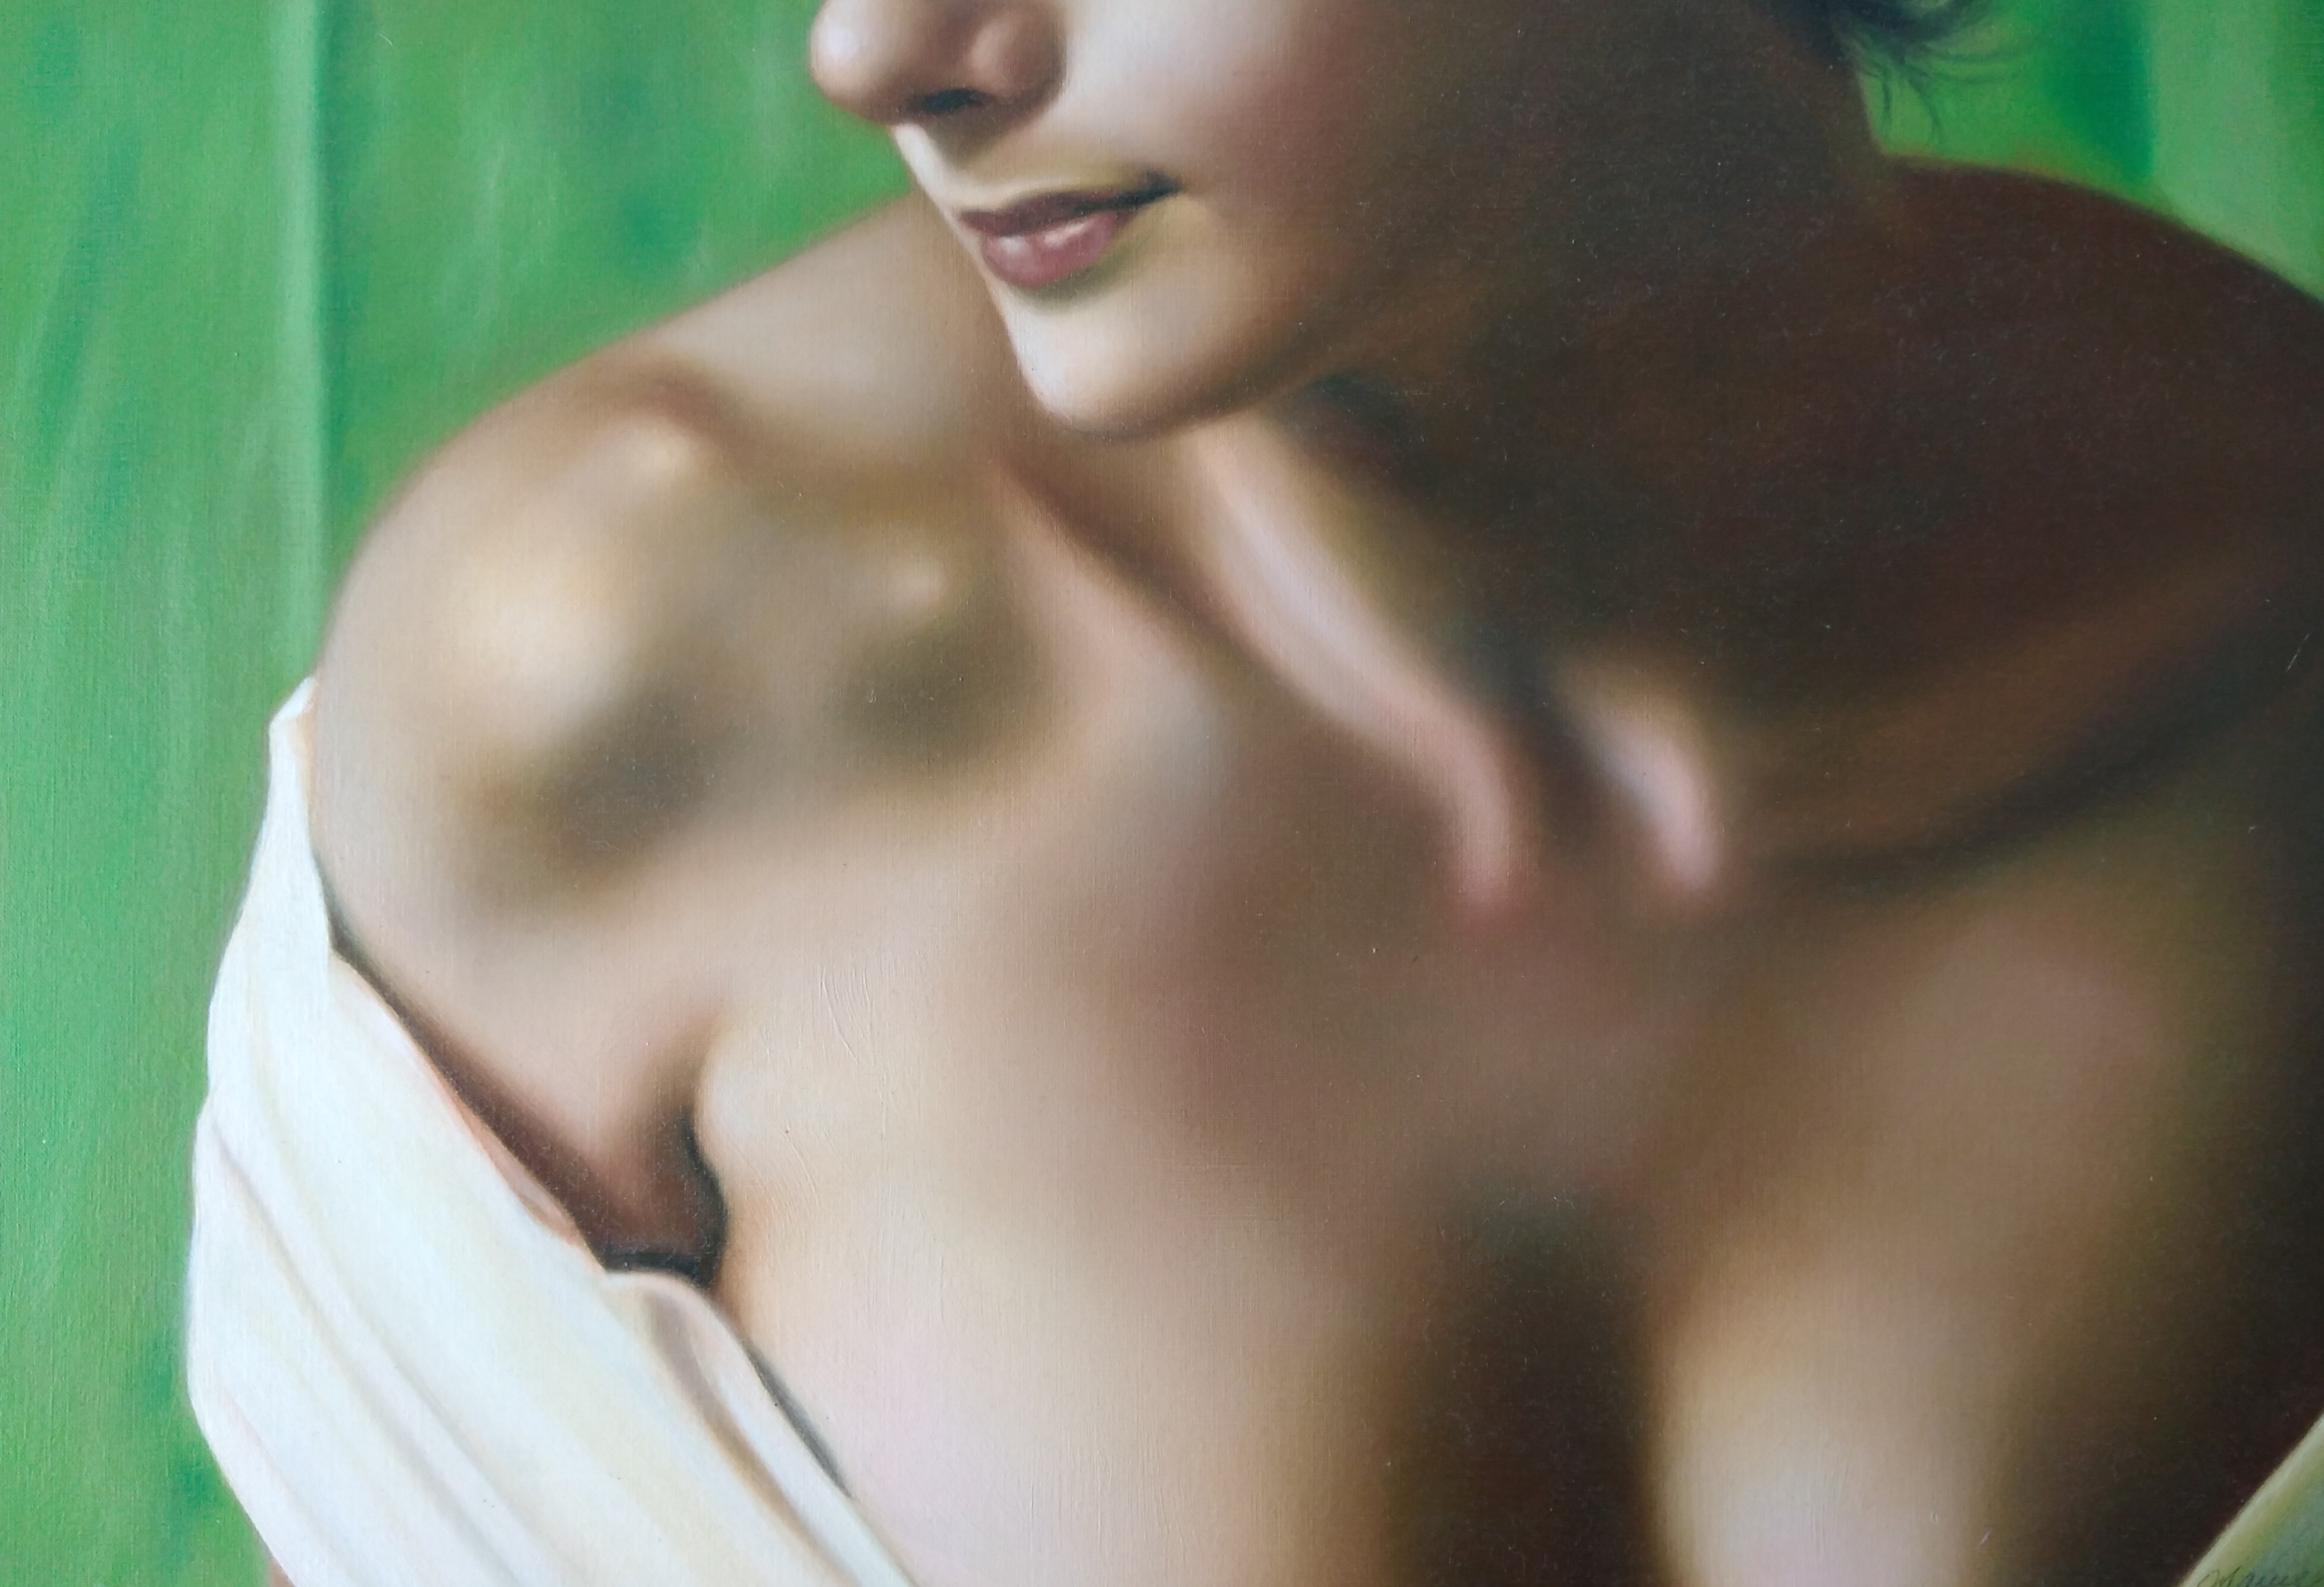
Simplicity is the key in choosing a technique to apply the colours. Some people will prefer the monochrome option (black and white or any single colour) to start with as it singles out the building of 3D shapes to dark and light values. This layer can be quite dry and solid as this will help merging the tones and applying layer over layer in the wet stage to adjust all the tones and shape correctly. When this layer is well dried, it is time for the colour. Give it a semi-transparent mid-tone layer. This is the general average colour you see from a distance or when squinting. This thin layer will offer a moist oily base to play in, while adding a more substantial colour later on, wet on wet.

Next you need to prepare just a 3-tonal value of this colour; one for the shady area, one for the highlights and a general mid-tone. At this stage you can leave out all the subtle complex colour you can see on the model as this will be applied later on in the next layer after it has dried properly.

The third layer is called glazing. This is where the small changes in the colour appear by brushing thin layers of transparent colours in the desired sections to created multiple variations of colour. This is also where the fine details are added to finalise the likeness of the model.
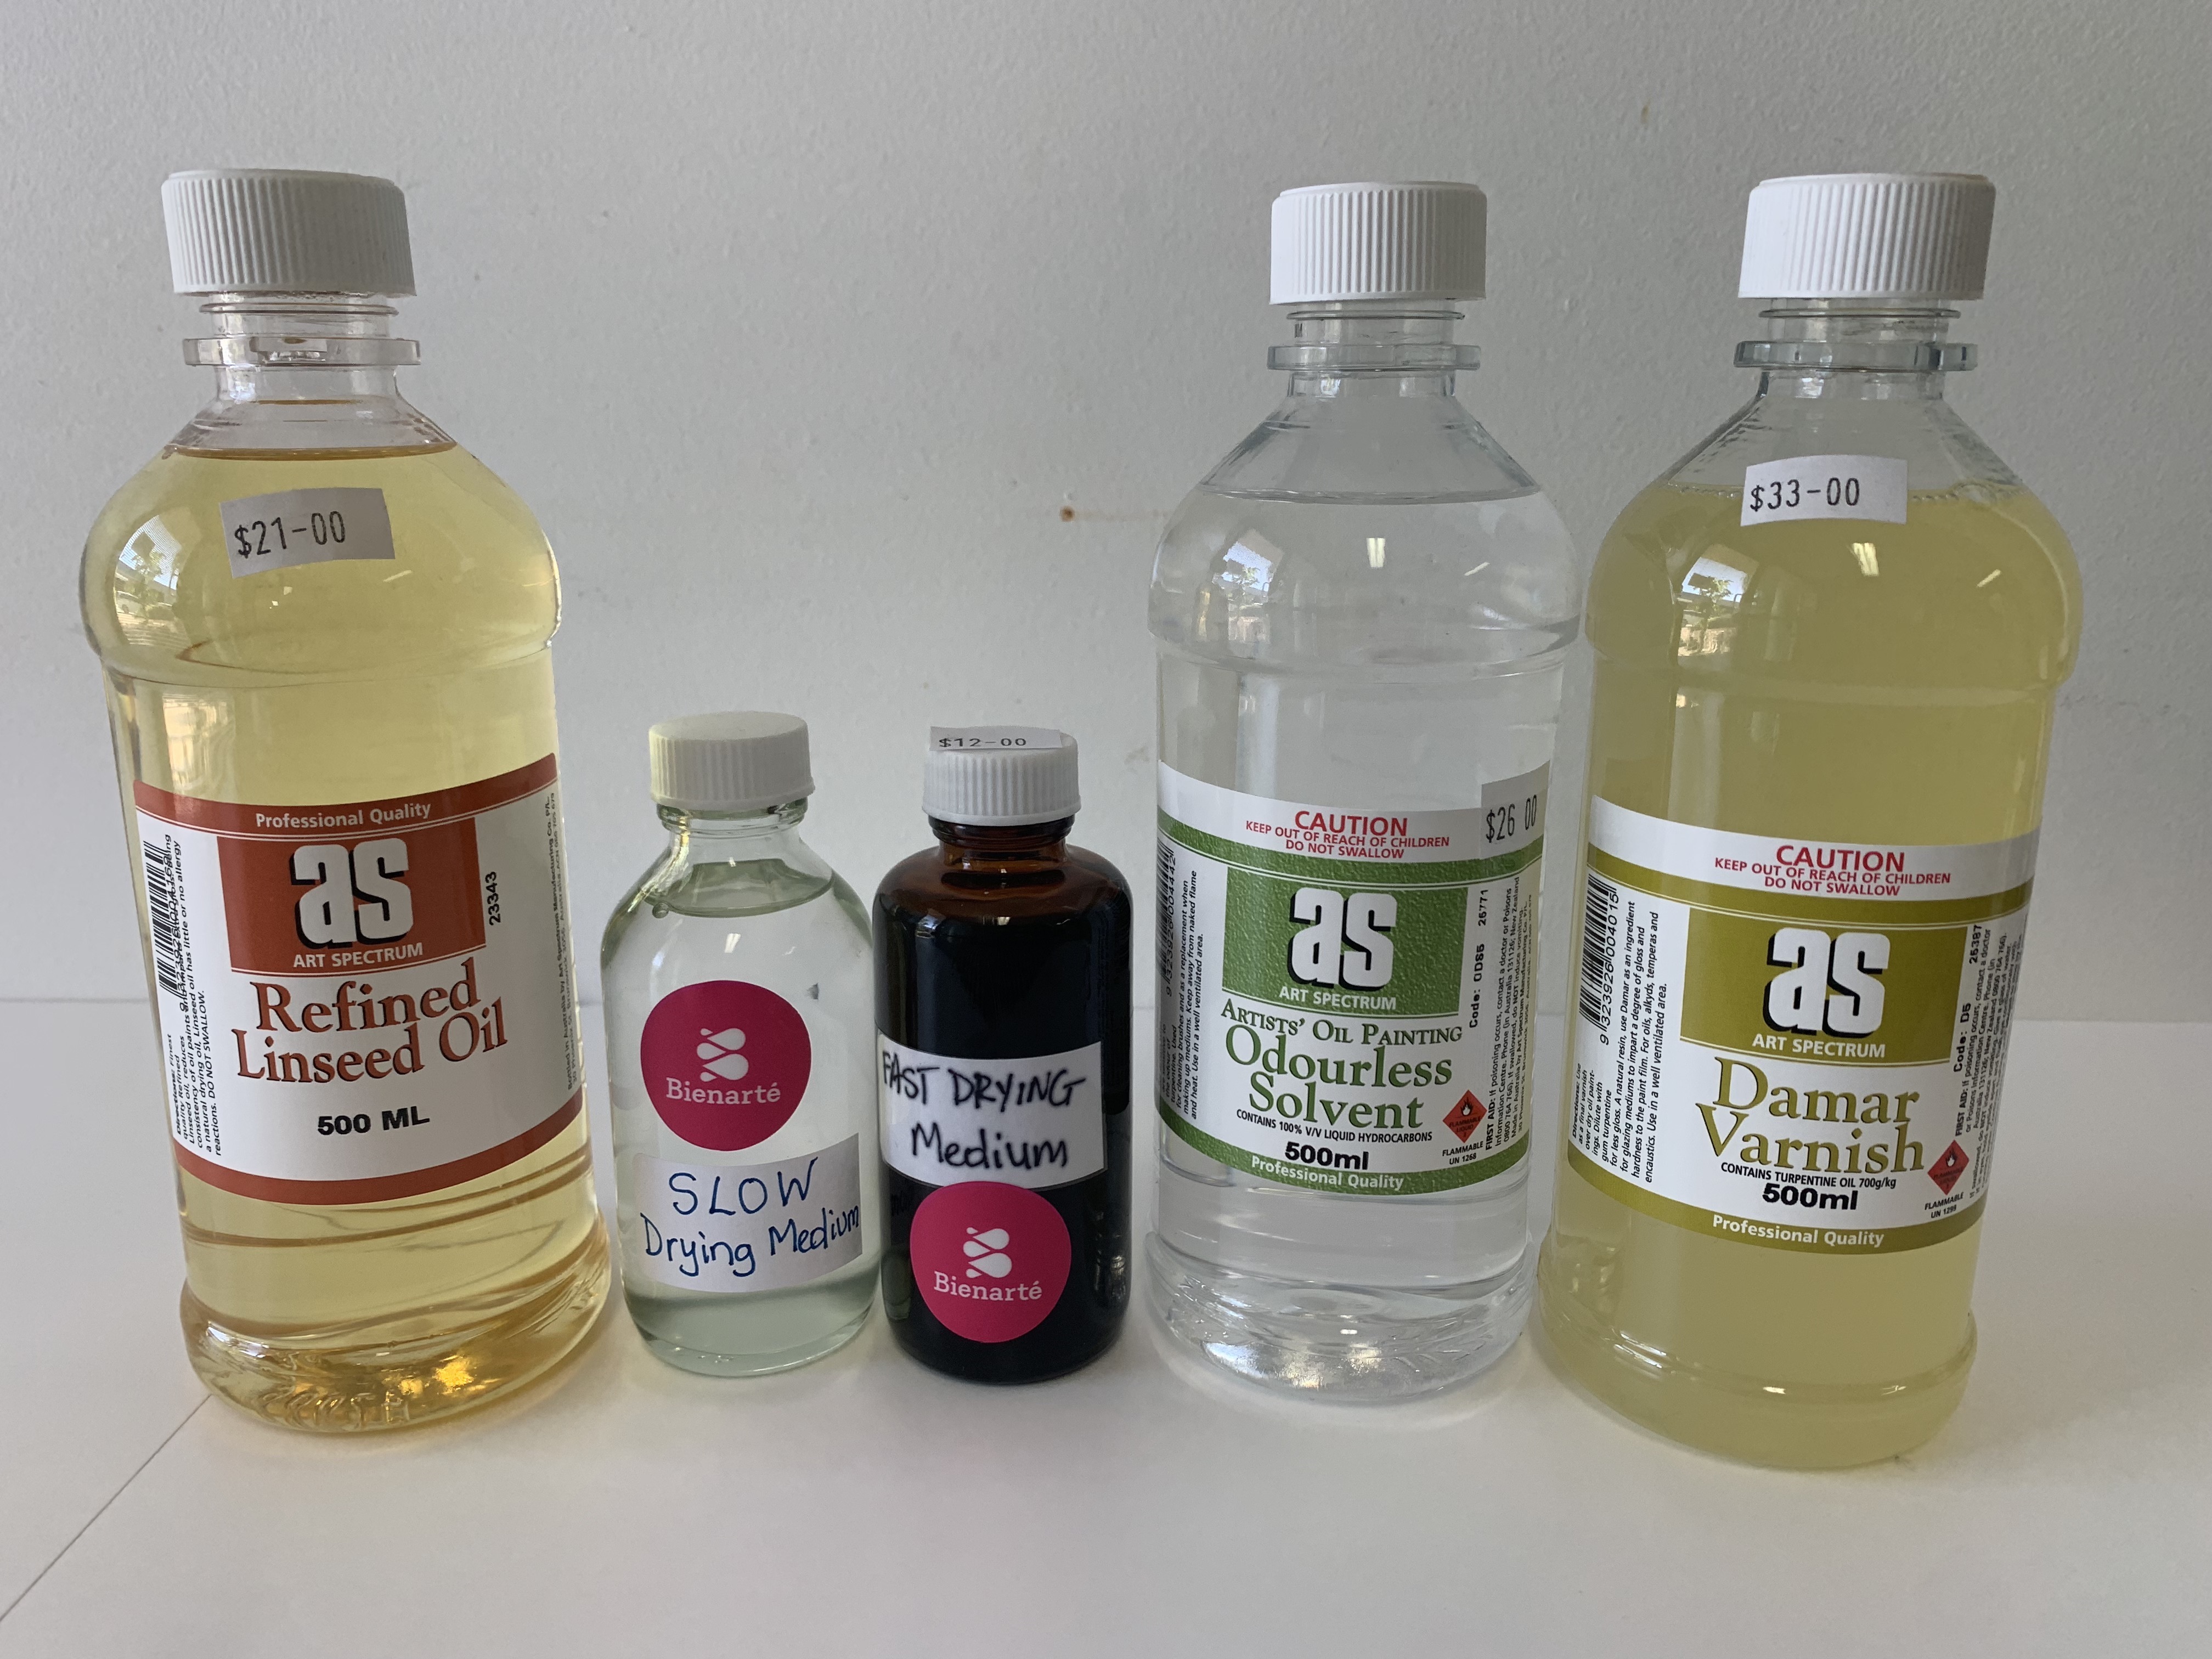
Oils, Mediums, Solvents and Varnishes, by Marcel Desbiens
Choosing oils, mediums, solvents and varnishes for your oil painting is as unique as choosing a colour palette. Your style and technique will guide your choicesThe commercial oil colours that we buy from art supply shops are made from finely milled dry pigments that are then ground into a paste through the addition of a small amount of oil.
A painting medium is added to oil colours for a few reasons:
• To help the flow of the oil colour on the canvas, paper or board
• To provide a protective coating to the surface for lasting strength
• To produce various optical effects of opacity and transparency
Most mediums can be found in art supply shops; however, some artists prefer to have greater control by making their own medium with basic ingredients such as oil, resin, turpentine, wax, alkyd, water and sometimes thickeners.
Generally speaking, a medium will be slow-, medium- or fast-drying, either gloss or matte, transparent or opaque and may also add texture. Mediums should be used in moderation as they can affect colour.
A slow-drying medium, or retarder, is used when the artist wants to have more time to paint an area of their painting, working wet in wet, or blending different areas. Most mediums will be a mix of oil and turpentine, and as turpentine evaporates faster than oil is absorbed, a slow drying medium will have a higher proportion of oil than turpentine.
The type of oil used can also have different properties, such as modifying colour consistency, changing gloss and drying times.
It is always good to read the label on bottles of medium that you purchase as they will tell you this information.
Making your own medium
You can experiment by making your own mix at home. A 50/50 mix of refined linseed oil and solvent (turpentine) will give you a fairly good slow-drying medium. But again, there are different solvents that can be used, and artists' solvents leave no residue after evaporating.
When you want your oil colour to dry more quickly, you would use an Alkyd medium such as Liquin, or make your own fast-drying medium by adding Damar resin to refined linseed oil and turpentine. You will need to experiment with the quantities to get the feel and drying time that suits you and your painting style.
Whether you use your own or buy pre-mixed, it’s best to practice with one single medium at a time and learn how to control it. It can take a while to understand its full potential and usefulness. You can then later try others and decide for yourself which ones best suit your style of brush strokes and optical effects.
Oil colours need oil to help them bond to the surface of a painting, so I would not recommend the use of turpentine by itself as a way to reduce the colours. The painting surface will suffer in the future with a dull visual appearance, a change in tone on the dark and brilliant colours and a fragile surface effecting the long-term preservation of the artwork.
Finally, you may want to protect your finished painting with a varnish. This will protect your painting from the build-up of dirt and grease. It can also boost or add to the matte, satin or gloss finish. However, it is important to ensure your oil painting has fully died before varnishing, and depending on your painting style, thickness of oil colours and mediums, this can be 6 months to a year or more